

How To Draw A Car In Processing
Sports cars always describe attention when in public, whether they be standing in the street or in motion. In this tutorial, come with me and larn how to construct a sleek sports car from start to finish!
i. Set a Guide in Perspective
Footstep 1
Firstly nosotros are going to found a crude guideline for our sports automobile every bit a base to build on. To showtime with, we shall depict a simple line across our folio which will be our horizon line. We require a low horizon for this moving picture, so the line needs to be on the lower half of the page.


Step 2
Nosotros then need to set out some vanishing points that will help the states with our perspective, and for this particular image we are going to utilize a two-point perspective setup. I find it best if these are placed quite a altitude from each other and, in this case, that ways placing points off the folio. To do this, you may accept to apply ii pieces of masking tape placed at either side of your sail and add both of your points using a ruler.


Stride 3
We can now draw the guide for our sports auto, and for this particular example we are going to draw iii boxes using our horizon line and vanishing points. Start past drawing a direct line coming from the left vanishing point.


Step 4
Then nosotros draw a second line coming from the same signal, but this time in a higher place the horizon line.


Step 5
Add together two more lines coming from this vanishing point, and we will have the rear of our box.


Pace 6
Now we are going to motility to the right mitt vanishing point and draw in 2 lines leading from this second point going beyond the folio.


Pace 7
Add in another two lines and you can encounter we have two stretched rectangles on either side of the horizon line.


Step viii
To consummate the box, draw in iv vertical lines that volition join both rectangles together.


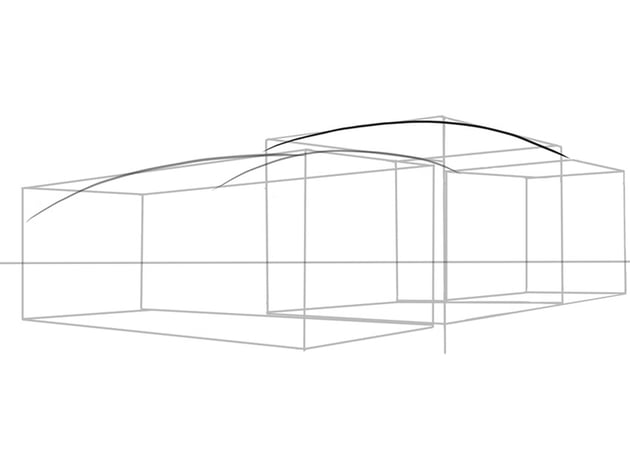
Step ix
Now that we have our beginning box in place, nosotros need to draw 2 more using our vanishing points and careful drawing. Remember to continue in heed the perspectives; equally y'all can see, the box that volition be for the passenger expanse is taller than our first, and we have a smaller ane that will make upwards the rear of the sports machine.


2. Construct the Car Trunk
Pace one
Now we take a guideline for our sports motorcar, and we are going to begin constructing the sports car in more detail. All the same, before nosotros begin doing this, I would propose yous get used to drawing curvy, flowing lines as we shall be using a lot of these as we progress.


Pace ii
Starting from the left side of the canvas, nosotros are going to depict the front of the sports machine using a simple curved line to begin with. Make sure this line is toward the left side of the folio.


Footstep 3
Next, we shall describe some other curved line toward the centre of the folio. These two curves will somewhen brand upwards ii small bulges on the front end of the sports car that will house the lights.


Step 4
At present that nosotros have the forepart of the sports automobile fabricated upwardly, nosotros'll draw the centre section, and here we will draw a bend that will be a guide for the windscreen and seating area. This particular car will be a convertible, so remember that as you are drawing.


Step five
A fourth curved line volition make upwards the rear of the sports car. Find that in that location are virtually no directly lines on this sports car, and the whole torso is built with aerodynamics in mind.


Step 6
We shall now go back to the mid-section of our sports motorcar and describe in a slightly downward curve, making sure to bring together the left-hand end with the curves at the front and the right-paw end with the curve at the rear of the automobile.


Footstep 7
At the very forepart of the sports car, we need to draw all the same some other big curved line that will exist the spoiler.


Footstep 8
The side of the sports car has a feature called side skirts, and these assist direct air towards ducts to cool the wheels and engine when the motorcar is in motion. With this sports car, the side skirts are made up of a modest upwardly curve. This needs to exist placed at the bottom of the car to the correct of the spoiler curve and needs to atomic number 82 to the rear of the guide every bit seen below.


Step 9
Now we demand to add the wheel arches for this vehicle and, again, a simple curve will aid you lot here. Sports cars are ordinarily low to the ground and, as a upshot, take rather wide wheel arches compared to a normal car to help them travel at loftier speeds, which you should conduct in listen as we draw.


Footstep 10
The side by side footstep would be to put in the door of the sports car. Be aware of the ducts and body lines nosotros drew earlier as the door volition need to fit in with these to retain the aerodynamic shape of the sports car.


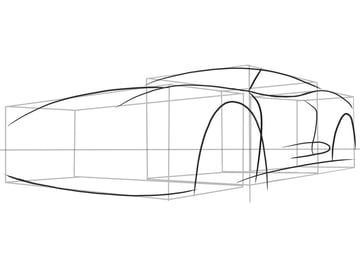
Stride 11
As you lot can encounter, many sports cars share the same curvy, sweeping lines and low body heights, but of form it is no secret in the automotive industry that these features all have an aerodynamic purpose and impact the speed and treatment of the automobile.


3. Build the Wheels
Stride i
As with the torso of our sports automobile it was recommended to practice drawing curvy lines, for the wheels it is a skilful idea to practice drawing circles and ellipses as we will need to be comfortable with this to carry out the following steps.


Step 2
Let's start with the front wheel as this will be the simplest. Draw a simple circumvolve either by freehand if you are comfortable doing and so or with a compass for accuracy if you would adopt. This will be our tyre.


Step iii
Now draw a second and third circle within the first circle that mark out the outer and inner rim of the tyre.


Step 4
At this stage I would also draw a smaller circumvolve only off to the left of the centre of our larger circles. This volition later become a brake disc.


Step 5
At the very centre of our circles, ane final circumvolve needs to be drawn, and this will be the centre badge for our wheel.


Footstep 6
For this particular set of wheels, we are going to go for a star design, and to begin with we shall draw a rough star guideline inside our circles drawn earlier and and then build this up.


Pace vii
We now begin with a slightly larger outer star outside our original rough sketch. This volition exist the outer part of the spokes.


Step eight
For the inner part of the spokes, information technology is to best to depict a droplet like shape, but have extra intendance when doing this as the shapes vary depending upon the perspective of the bicycle.


Step ix
Follow the drop shape method for the rest of the inner spokes effectually the wheel, only notice the slight deviation equally we go along round.


Pace 10
At present you can erase any overlapping parts of the brake disc y'all drew earlier, and you will start to accept a complete looking cycle.


Footstep xi
For the rear wheels and rims, ellipses or ovals are the best shapes to draw. Every bit previously advised, practise drawing these if yous feel the need to do so.


Footstep 12
One time more, a star shape will help you as you construct the spokes. Take note as we work how much perspective and distance accept an event on this second rim in comparison to our kickoff.


Step 13
If you take great intendance, specially with tight areas such as this, you should have a consequence like the image below.


4. Fill in the Details
Step one
Now we have all the primary parts of the sports machine drawn in, nosotros can focus on the small details that volition bring our hard work together. Starting again from the left side of the newspaper, describe an egg shape with the top at a downward angle, and and then describe an oval shape inside the egg. This volition be one of two air intakes for the forepart wheels.


Step ii
Moving across the front of the car, we need to describe a second egg and oval shape facing the opposite direction to our start ane. Be aware of perspective again with this second oval as you will notice that it will need to exist larger than the get-go.


Step 3
Now, hopefully if you have positioned your ovals properly, nosotros demand to draw ane terminal air intake, simply this 1 volition pb to the intercooler at the front end of the automobile. Take annotation that it this is of a more square shape with it being directly at the forepart. The intake itself has a slight "scoop" feature that helps to direct air into the intake, and so be aware of that as you lot depict.


Step 4
Staying at the forepart of the car, we shall now describe in the lines for where the front spoiler is fastened and the "close" lines for the bonnet.


Pace v
To complete the forepart end of our motorcar, we shall now add the lights. Retrieve to keep them in line with the trunk for aerodynamic purposes.


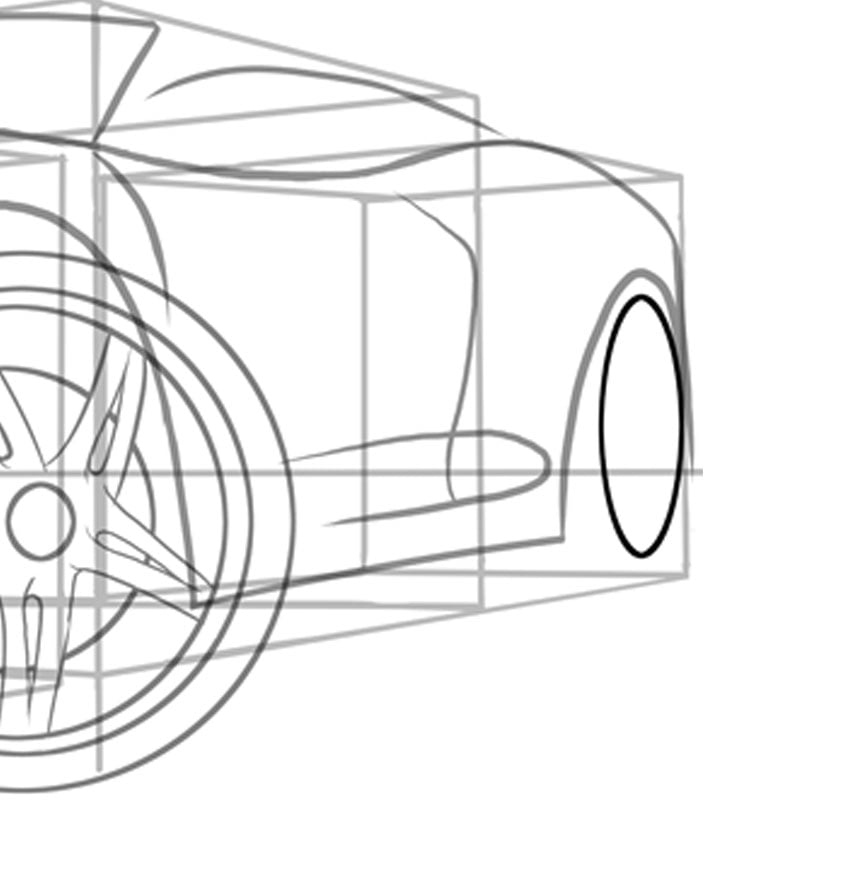
Step half dozen
Now we need to return to our wheels and add together the all-important restriction callipers that are used to terminate our sports car. On sports cars such every bit this, the callipers are rather large every bit a lot of braking power is needed to terminate the car when it is travelling at speed. The calliper itself wants to be situated on the left side of the brake disc.


Step seven
Staying with the brakes, we'll add a few pocket-sized holes in the disc that aid get rid of excess heat that might cause issues if the car needs to brake rapidly. Remember to make clean up whatever loose lines after you lot have finished with areas like this.


Step 8
Moving right forth the car, we tin can now place in such details as the wing mirrors and door handles. Once again, perspective will play a office here, and you lot can meet a lot of the interior is masked by the wing mirror itself. Always remember to bear these points in mind every bit y'all work.


Footstep ix
Add in what little interior we tin can see, such every bit the passenger seat and the integral roll bar backside.


Step 10
Nosotros at present need to add any cooling vents that are remaining on the body, such as on the elevation most to the rider expanse and merely in front end of the rear wheel.


Step 11
All that is left for yous to do is to clean upwards all your construction lines and by and large tidy up your drawing.


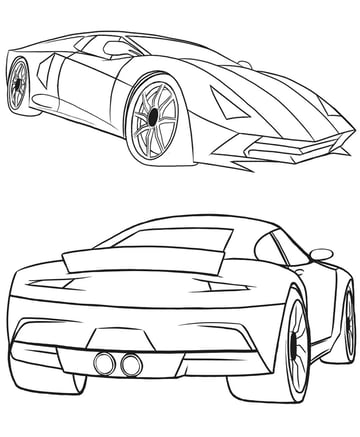
Awesome Work, You're Done!
A little splash of colour will not get amiss on a auto like this.
At last you have an awesome looking sports car that is ready to tear up the streets. Have fun making up your own designs using some of the principles discussed here, and who knows what you lot could create!


Source: https://design.tutsplus.com/tutorials/drawing-transport-how-to-draw-a-sports-car-from-scratch--cms-26920
Posted by: jolleycapecontabir.blogspot.com
0 Response to "How To Draw A Car In Processing"
Post a Comment